

Following health and allergenic reactions to the property “Building Forensics” undertook a an investigation of the property to assess if mould was likely to be present.
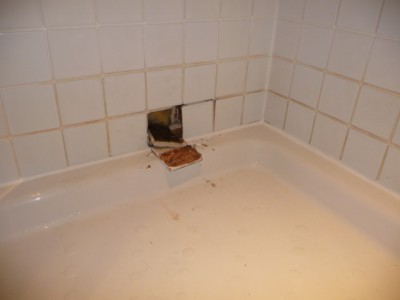
The property was in good decorative condition and no visible mould was present.
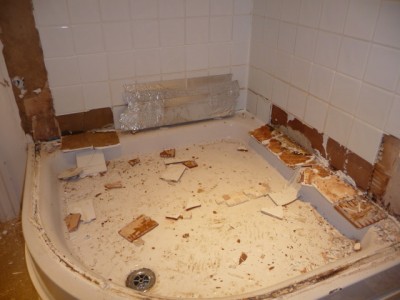
A moisture mapping exercise was undertaken using thermal imaging cameras and ultrasonic radio meters. One of the areas identified as wet and likely to provide ideal environmental conditions was the lower wall of the shower cubicle.
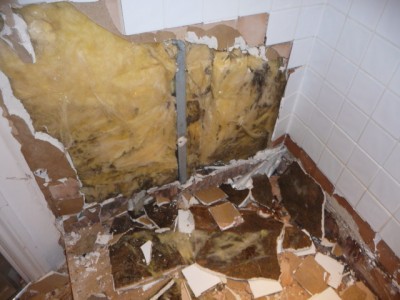
A slight pressure was applied to the wall area and tiling and to assess the integrity of the plasterboard tiled wall and the phorto shows the collapse due to saturation..
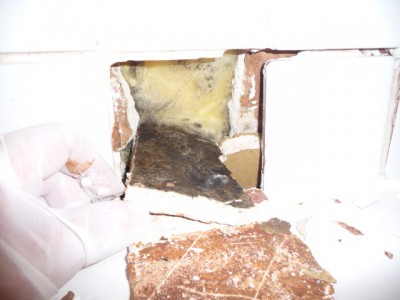
Following the initial assessments the plasterboard wall was assessed for integrity and likely mould. It should be recognised that plasterboard or gyprock is absolutely ideal substrate for mould growth and the dark areas in a wall cavity make ideal environmental conditions for toxic mould where long term moisture or humidity issues exist
Obviously if we now investigate further we must contain any spores or mycotoxins released from the damaged area. This means the erecting of critical barriers and provision of negative pressure before any intrusive investigation is undertaken. It should be relalised that afetr the tile was moved mould odour was present and the high moisture levels detected meant that mould was 100% likely.
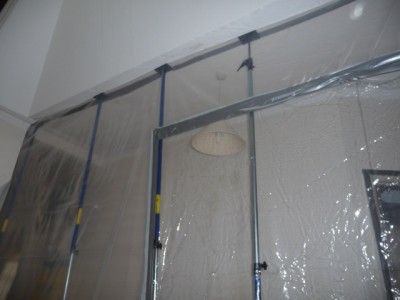
The first enclosure is to the landing area
Obviously if we now investigate further we must contain any spores or mycotoxins released from the damaged area. This means the erecting of critical barriers and provision of negative pressure before any intrusive investigation is undertaken. It should be relalised that afetr the tile was moved mould odour was present and the high moisture levels detected meant that mould was 100% likely.
The first enclosure is to the landing area
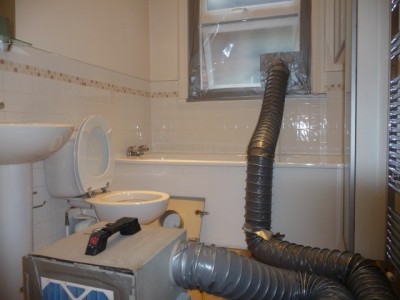
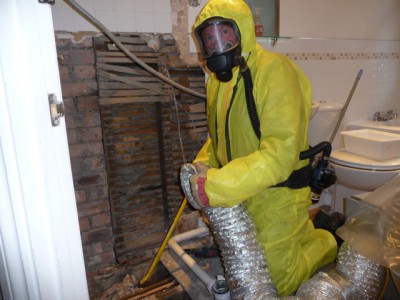
Once the environmental controls are installed we must protect our technicians with full personal protection equipment. In this photo we show the technician, wearing a full Biological suite with powered full face respirator fitted with toxic chemical cartridges. The chemicals likely to be released are known nerve agents.
The extent of soft demolition must be carefully considered to prevent unnecessary cost. In the following photos we show the stage by stage process where contamination is carefully removed.
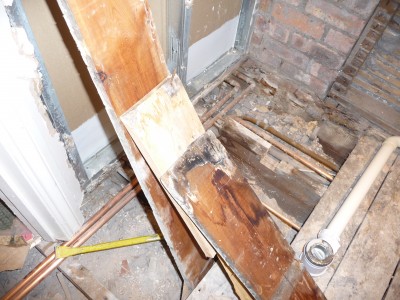
The extent of the wet walls indicates that the areas below the shower tray will be wet and mould growth is most likely and must be investigated.
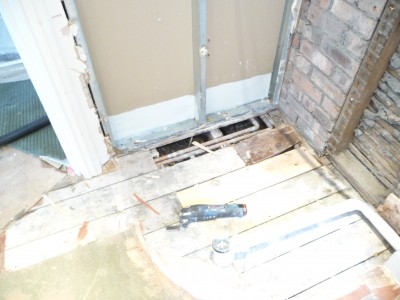
The floor boards can be seen to be contaminated and they too must be removed
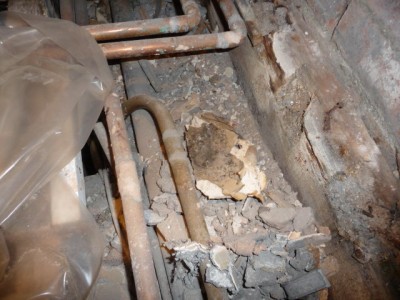
By applying reagents we can immediately see mould has penetrated the wood floor and we removed it to assess the sub floor void above the ceiling below.The photo shows visible mould to floor board underside.
By applying reagents we can immediately see mould has penetrated the wood floor and we removed it to assess the sub floor void above the ceiling below.
Once the sub floor void has been cleaned it must be snitised as best as possible. It should be recognised that spores may have penetrated and travelled throughout the sub floor areas. Techniques do exist to assist in the control of these spores and contamination but in the meantime the area must be sealed.In this case we covered in plastic and satpled close but continued with negative pressure untill such time as builders undertake repairs.
We offer a nationwide service
Here you can download our CV Biography of a principle consultant.